Rima Joy's (Reusable) Advent Calendar
advent calendar diy + inspiration
Rima Joy is back!
– and this time she is bringing you a reusable advent calendar that you can DIY yourself. We love making an advent calendar, but having to do it every year can be tedious. Here, she is helping us get crafty and make something unique – and then we get to keep using it every year! She has shown you her special way, but I think you can do all sorts of fun things to make the bones of this craft especially yours.
Take it away, Rima:
I’ve always loved anticipating Christmas. As a kid, months before any decorations were up at the mall, I would be scouring our toy magazines, circling items that caught my eye. My excitement only grew once the Christmas music, the decorating, the baking, and—in full disclosure—the present peaking began. I’m not sure why my mom thought the guest room was a good place to hide gifts. So obvious.
Well, now I’m an adult with my own children, and it’s time to get them excited for Christmas! I don’t think I’ll have a hard time getting my sons to follow in my footsteps. They were asking for Christmas music in October! But I don’t want them to only be excited about lights, snowmen, and presents. I pray that the time leading up to Christmas will help our sons grow in their excitement and understanding of the greatest gift of all—Jesus Christ, God in human flesh, the Savior of the world.
Using an advent calendar is a great way to build anticipation and explore the mystery of the incarnation (God made man) at the same time. I’ve put together a list of 25 passages from scripture to use (along with chocolate of course!) in a handmade advent calendar for our family. Each passage focuses on a simple sentence about who Jesus is or why he came, and the last couple of passages focus on the events surrounding Jesus’ birth. We read one passage a day to help us celebrate the advent season. Would you like to join in our tradition?
Supplies Needed:
- 25 small favor tins (You can find these in the wedding section at craft stores.)
- 2-3 sheets of Christmas cardstock
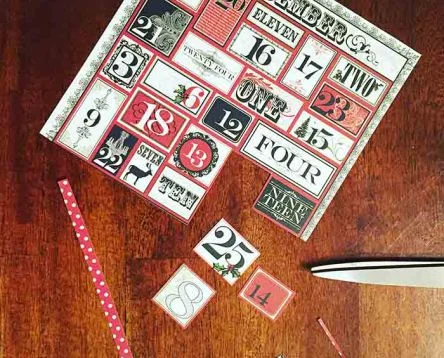
- Numbers 1-25 (I found cute Christmas card stock with numbers on it and just cut the numbers out. You can also use numbered stickers or write/stamp your own numbers and then cut them out.)
- Blue gel school glue
- 12×12 shadow box
- 25 small magnets with adhesive backing
- Print out of scripture passages
- Acrylic craft paint and sponge brush (optional)
prepping the shadow box:
- If desired, paint the shadow box with the craft paint and allow to dry.
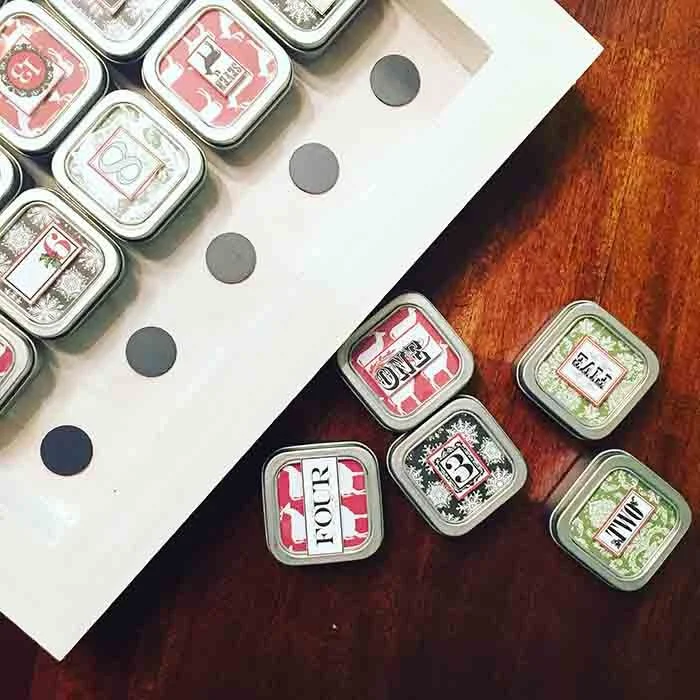
- Once dry, apply the magnets to the box. The magnets will hold the tins in place. To ensure that the magnets line up properly, I used the following process:
- Place a magnet on the bottom of each tin (the adhesive side of the magnet should be facing out).
- While the magnets are still on the tins, peel off the protective papers from each magnet.
- Line up the tins in the shadow box, and press down firmly so the adhesive from the magnet sticks to the shadow box.
prepping the tins:
- Cut the Christmas card stock into 25 5x5cm squares.
- Take the lid of one of the tins, and place 5 dabs of glue underneath the lid (see image). Place a square of cardstock underneath the lid, so that the pattern shows through on the front of the lid. Repeat the process for each lid.
- If you are not using stickers, cut out your numbers.
- Center and glue (or stick!) each number to the top of the lids.
- Allow the lids to dry overnight before placing them back on the tin.
Assembling the Calendar:
- Cut each day’s scripture reading into a strip. Fold each strip and place in the corresponding tin. We like to include a little piece of chocolate too.
- Put the tins inside the shadow box in order, and you’re ready to go!
Thank you so much for letting me share with you today! I hope you enjoy our tradition as much as we do. -Rima Joy


